Sunday, March 27, 2011

Making a seamless tile

Hi again!  I'm back!

I thought I'd show you how to make a seamless tile using GIMP.  It's not really terribly difficult but it will give you a chance to learn a few tricks in GIMP that should be fun.  We'll make a simple tile in this lesson and then perhaps make some variations on it in future posts.

Here's a rough outline of what we'll do:

  • Open GIMP and create a new 64x64 image as our canvas.
  • Create a very rough and perhaps a little cartoon-like flower shape and color it in.
  • Create a copy of that cartoon-like flower and split it down the middle both vertically and horizontally
  • Compress the layers we have created into one and then map it as a tile.
The test of a seamless tile is the seams.  If you can see them, you've failed.  So we will look closely and see how we've done.  Ok... Let's go through it in detail now.

Open GIMP and create our canvas:


Find GIMP and start it up then:

  • File->New .... and make the size, width = 64 and height = 64.
  • In the Gimp Layers window press the  "Create a New Layer" icon and choose 'transparent'
You should now have two Layers in your Layers window.... looking like the picture at the right.  (click on it to make it bigger)

Create our cartoon-like flower:


This is the creative part of this technique.  Your flower will not look like mine, and it doesn't matter if it looks really rough.

  • Make sure you have the "New Layer" layer selected in the layer window, then click on the thing that looks a bit like a lariat.  When you hover your mouse over it you will see it's called the "Free Select Tool".
  • Go to the image window and use your mouse wheel to make the white square bigger and then click and hold the left button of the mouse and drag it on the white area to trace the outline of your flower.  As you do so, try to make your selection end up very close to where you started and release the mouse button.
  • Now go to the color selector on the Toolbox window and click on it - then play with the colors to pick a color you like.  As you can see, I picked a nice pink.  :)
  • Now select the Bucket Fill Tool (looks like a dripping paint bucket) and go to the Image window and click within the area you have selected.  
Here's a GIMP-trick you will find useful as you use the Free Select tool.  Let's say that about half-way through your flower is looking like a nondescript lump of something that may be rather... well... smelly.  :(  Here's how to start over.  Finish your Free Selection by taking your cursor up to when you started and clicking... that will complete your selection.  And now press Ctl-Shift-A (or Select->None).  That will clear the selection and let you start over again.  Don't feel bad if you have to do this several times.  It usually takes me 3 or 4 attempts to get something I like.

Another GIMP-trick that may work as well, and is often even better is Ctl-z (Edit->Undo History).  It simply steps you back one step for each time you press it.

The picture below will give you an idea of how mine looks at this stage.


Duplicate the layer and transform it:

  • Now make sure you have your new flower layer selected, and on the Layers window find the "Create a duplicate layer..." icon and press it.  The new layer will be a copy of the first and will be selected.  
  • Go to the Image Window and choose Layer->Transform->Offset then click the "Offset by x/2, y/2" button and then click the Offset button.
Your result should look something like the image we see below:


This is the only tricky part about this process.  So lets look carefully at what we have done here.

We have taken the cartoon flower we created and made a version of that layer that is literally turned inside-out.  If you draw an imaginary line through the middle both horizontally and vertically, then take the upper left quadrant you have created and mentally move it to the lower right.  Also then imagine that you're doing something similar with all the other quadrants and you have what the new layer we have created has done.  With this, we create a diagonal pattern to the fabric.  Since our original tile is square, the diagonal goes off at 45 degrees.   If we wanted some other angle for our diagonal, we could repeat this process with a non-square starting canvas.  You might try it with a 64x128 canvas and see how it works.

Compress the layers and map it as a tile:


Now for the final few steps!

  • On the Image window choose Image->Merge Visible Layers.  Notice that the image window appearance has not changed, but the layers have combined into one.  This is our seamless tile. 
  • Now we will test our tile....  On the Image window choose Filters->Map->Tile.   I have choosen to make the test 640x640.  
And you can see the results below.


Now we will take a look at it more closely and see if we can see any seams.


Nope!!  Not seam to be seen!

Sooooo..........  What do you do with this sort of thing?  Can you spell... F..A..B...R...I...C?    Yes!  How about a nice pink flowered dress?  We'll have to make a dress sometime in the future and we'll use this technique to make the fabric for it.  Well, and perhaps I'll add a few more interesting twists too.  *winks*

robin

Friday, March 18, 2011

Make a word cloud

You know... those things that have the words in some text you've given it with those more important bigger and those less important smaller.   Then they get arranged in random directions in a cloud-like shape.   Well... its pretty easy if you use Wordle.  You can find it here: http://www.wordle.net/ .

I ran it against the previous posts in this blog and got this:

The way you get the jpeg file to post is to use your 'snipping tool'  (windows 7).

I like it!

robin

Wednesday, March 16, 2011

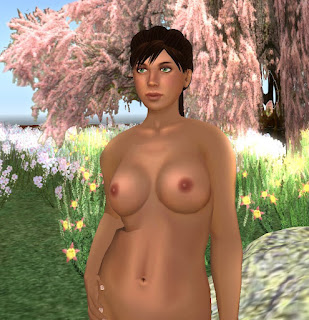
Your new Skin - Step 5 - Shape Modifications

I expect that your first thought was that shapes and skins should be pretty independent of each other.  Ans, in truth, that is true for most things.  But there seem to be some where the two are intimately interrelated, one is the breasts and a second is the mouth/lips.

Look closely at the breasts in the skin we've been working on.  There is a shadow under each breast a sharp line indicating where the breast and chest meet. That is entirely appropriate for a woman with larger breasts, but not so much for a woman with smaller breasts.  Fortunately Eloh has thought about that and in the 'starlight_upper' file has provided a second breast choice that is more appropriate for small breasted people.

The second area is not quite so obvious in the picture here but in truth is much more variable with shape than the breasts... that is the lips and mouth.

In this post we'll make changes to the mouth (lips), legs, shoulders, face length, and hands.  In the end, I think in the end, you will like the results.

But First.... Camera Controls!!


But first, we need to be able to look at our selves in detail.....  front and back, up and down, in and out - we need to be able to view our body (avatar) from every angle and do so quickly with little muss or fuss.

Fortunately, Second Life provides a way to do this.  It will seem to be a little weird at first, but as you use it you'll find it more and more natural and easy to use.    What we will do is use the mouse together with the alt and control keys.  Try this:

  1. hold the alt key down, position the mouse over your avatar's midsection and click the left button on the mouse and HOLD IT DOWN and you move the mouse.  Move the mouse horizontally (left and right) and vertically (up and down) and watch the effects.
  2. hold down the ALT AND the CTRL keys down together, position the mouse over your avatar's midsection and click the left button and HOLD IT DOWN as before.  Move the mouse horizontally and vertically again and watch the effects.
In the first case (1) you saw the view of your view of your avatar circle your body as you moved left and right, and zoomed in and out as you moved up and down.  In the second case (2) you saw the same as in the first for the left and right movment, and you rotate around vertically when you move in and out.

With this you can position your camera view to look at your avatar in any way quite easily.  Use the mouse and the control and alt keys to look at your lips, face, hands, shoulders and legs.... zoom in and out and look from every angle.

Editing your avatar:


Right click on your avatar and choose "Edit Appearance".     We'll step through each of the items we've noted in the last couple posts and 'correct' them.  Remember that this is really subjective - your opinion is as valid as mine and if you dont like the result, it is fine - change it to something you do like.


  • Face is too long:  Within your Appearance editor, choose Shape->Head->Head Stretch and set the value to 20.
  • Legs are too long:  Within your Appearance editor, choose Shape->Legs->Leg Length and set the value to 36.
  • Hands are too big:  Within your Appearance editor, choose Shape->Torso->Hand Size and set the value to 30.
  • Shoulders are too broad:  Within your Appearance editor, choose Shape->Torso->Shoulder and set to 20.
  • Lips are too narrow:  Within your Appearance editor, choose Shape->Mouth->Lip Fullness and set to 50.
Now let's take a look at our results......  Hey, that's a pretty cute avatar!   (Click on the picture for a closer look.... and if your cursor shows a plus sign in it as you hover over the image, click again for an even larger view.)

Now I have to confess, that I tend to twiddle and tweak my avatar endlessly and if left to my own devices I would do the same with this one.  But really, this is now a quite nice avatar with a quite nice skin.  One that you would be happy to wear anywhere in Second Life.

What's next?  Next is up to you.  Be sure you save this shape and skin somewhere and make a copy.  Play with the shape - editing things and see what happens.  Play with the skin - make the skin lighter or darker.  Try the various options that Eloh has provided for breasts, eyes and nose.   Add lip color, eye makeup and nail color.  Change the brightness of the highlighting and the darkness of the shadows.

Create YOUR UNIQUE LOOK within Second Life!

It will be fun - I promise!

See ya!
Robin

Your new Skin - Step 4 - Skin Modifications

So far we've just been taking the shortest path to producing a skin with Eloh Eliot's Open Source Skins.  Next we will explore some of the options Eloh has provided for us, and then dip our toe into making modifications of the skins she has provided.

But first!!  ....

We need to talk about an important, though quite technical, issue.  Its that of file size.  To paraphrase the famous quote from Albert Einstein, we need to make everything as small as possible, but no smaller.  This translates into doing two things BEFORE we upload our files into Second Life:
  1. Scale the files from 1024x1024 to 512x512.  (smaller would be too small)
  2. Make the file type JPEG (jpg) on the files that have no transparency (upper and lower) and PNG (png) on the file that does have transparency (face).   In this application I've seen the jpg files be 1/10th of the size of the same thing saved as a PNG file.  So reserve the PNG file for cases where you need it, for example the face file.
I hadn't mentioned this technical issue before to keep things simple.  But as we near the point where we will be moving from temporary files to permanent files, its important to keep the size of the files we're creating in mind.  Scaling the files is very easy in GIMP, here's what you do:
  1. First save the file in its 1024x1024 size.  you dont want to loose it.  Do this with File->Save.
  2. Use  Image->Scale Image.  Simply type 512 on the Width and press enter, the Height will change for you.  Then click OK and watch GIMP make the file smaller.  
  3. Use File->Save As.  I change the file name to add '...512.jpg'  or '...512.png' to the end as a reminder that i have made the file smaller.  So an example name might be "starlight_face yymmdd 512.png" and "starlight_upper yymmdd 512.jpg".
Modifications:


Now on to the fun stuff - modifications.  This is where you start to personalize the files to something that YOU like.

As you were looking through the layers you might have noticed that there were layers that were not visible and they had names like breastB or lipsA.    We will make use of just one of these, changing from lipsB to lipsA and look at the difference it makes to the shape.  And we will be just a little more daring - and modify the basic skin color so something a shade or two darker.

Modifying the lips:


Ok, here's what to do:  Open up the "starlight_face 110228.xcf" file we created before and look through the layers and find those that start with lipsA.   Most will have a little eye next to them indicating that they're active.  Go through and click the eyes turning them all off.   Now if you look at the layers below, you will find a bunch named lipA.    You'll need to turn MOST of these layers on, but NOT ALL.  For now, turn on all EXCEPT:

  • lipsA.base
  • lipsA.base.lighter
  • lipsA.color.*  (leave all of the lipsA.color layers off for now)
That should make 18 lipsB layers turned off and 18 lipsA layers turned on.

Now look at the image shown by GIMP.... to my eyes the shading at the corners of the mouth and below the lower lip look a bit dark.  So we will adjust them.  For the corners, find lipsA.corners.shade and drop the opacity from 100 to about 20.  For the shade under the lower lip, find lipsA.lower.shade 2 and turn it off (click the eye to turn it off).

Modify the skin color:


Now its time to be brave and modify the skin color.  :)

In the layers window, scroll all the way to the bottom.  You'll see a layer named 'base.color'.   Select it by clicking it (the line will have a blue back-light) and find the 'duplicate layer' button (circled in the image on the right) and click it. You will get a new layer above the selected 'base.color' named 'base.color copy'.  (Click on the picture for a closer look.... and if your cursor shows a plus sign in it as you hover over the image, click again for an even larger view)

Now select that layer and choose the "color picker tool" from the GIMP Toolbox Window.  (For reasons that are not clear to me, it looks something like an eyedropper.)  Now go to the image window and click on it with that 'color picker' and you should see the "foreground color" in the Toolbox window change to be that of the 'base.color copy' in the image window.

Next we will click on that "foreground color" in the Toolbox window and you will see a window open to help you change the color.  It should look rather like the image below this paragraph.


We will pause here for a minute and look at the Change Color window.  Note the series of six rows to the right labeled, H, S, V, R, G, B.    These are the color change controls and they are two groups, HSV and RGB.  HSV stands for Hue, Saturation and Value and RGB stands for Red, Green and Blue.  Both are complete - you can use just one set or the other.  For some purposes HSV is easier to use and for other purposes RGB is easier to use.  I'll let you google the two for more detailed information, for our purposes here we'll be using HSV.  In fact, for the present, we'll just make some small changes to the Saturation and Value leaving the Hue alone.

If you look at the large color window on the left of the image above, you'll see what looks like a cross-hair inside it.  Now draw a diagonal through that cross-hair sloping down from left to right.  We will want to work along that line for the skins.  Its probably not a straight line though. I would expect it to be curved away from the extremes at both corners so something more like the red line drawn in the picture to the right would be the right range of reasonable colors for skins.

We want to make the color of the skin a little darker.  That means we will want to move that cross-hair up and to the left a little.  If you play with the S and V values with the controls (circled on the right in the image) you'll find that changing the S value will move the horizontal part of the cross-hair up and down, and changing the V value will move the vertical part of the cross-hair left and right.    So.... moving the cross-hair intersection up and to the right will mean INCREASING the S value and DECREASING the V value.   For now... I would suggest increasing S by 3 and decreasing V by 4 so the final values will be 54 and 60.

Now we want to apply this new color to our copy of the base color layer we created earlier.  So - make sure that the "base.color copy" layer is selected in the layers window, and choose the "Bucket Fill Tool" in the Tools window (it looks like a tipping paint can) then make use of that tool on that layer by clicking on the image window.  You should see GIMP make the change and notice that it the color is slightly darker than it was before.

Saving the File:


It's time to save our work. First we'll save the file as is, but change the name so we can backtrack if necessary.  Then we'll scale the file to something smaller and save as a png file (we have some transparency in this file so we need to use png).

  • File->Save As  ... naming the file "starlight_face 110315.xcf"  (the general format of the date is yymmdd in my scheme of things)
  • Image->Scale .... choosing 512x512 and clicking ok.
  • File->Save As ... naming the file "starlight_face 110315 512.png"  (adding 512 to the name is a reminder that the image was scaled down, if you don't need it's ok to leave it off - but I DO need it).
Changing the skin color on upper and lower:


Making the same changes to the upper and lower textures for our new skin is pretty straighforward now that we have the color defined.  I'll just list the steps for the upper, I'm sure you can work it out from that:

  • Load "starlight_upper 110224.xcf" into GIMP.
  • Go to the bottom of the layers window, select base.color and click the 'duplicate' button.
  • Select the new layer named 'base.color copy' in the layer window
  • Select the bucket fill tool in the Toolbox window
  • Click in the image window and watch the new color be applied.  (we're using the same color as we did earlier for the face texture)
  • Save the file, changing the name as described above
  • Scale the image as described above
  • Save the file as a jpg image as described above.
Then repeat the above for the starlight lower file.  (all of this takes longer to read than it does to do )
Upload and try it out:


Now go back to the previous blog post and repeat the process to upload the textures and apply them to a new skin.  Remember to copy your current skin and name is with today's date so you can discard it and back up to the previous without running into problems.

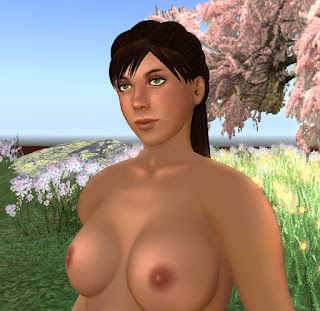
After uploading the new textures and creating the new skin we should pause and look the results.   As I mentioned in the previous post, we are now wading cautiously into the subjective so it's totally ok if your opinion of the changes made are different than mine.

Looking at the lips now, I like them better.  They're still 'not quite right' but in my opinion, they're much more right than they were before.  In the previous post I noted five things that were in the 'not quite right' category and I'll repeat them here:

  • hand size
  • leg length
  • face length
  • shoulder width
  • lips
We'll make changes to each.  But that will be the next post.  *grins*

See ya!
Robin

Friday, March 4, 2011

Your new Skin - Step 3 - Second Life

Hi, I'm back!   And we're ready for the last step - turning the textures we created in the last step into a skin.

Before we do that though we need to sign onto Second Life and do some housekeeping in our Inventory.  I'm going to assume you know how to sign on and get access to your inventory.  You may also have some nice skins and shapes that you are pleased with, so we want to be careful to not muck with them.  To do this, and provide a path for people new to Second Life - we'll copy a skin and shape (and hair and a few other things) from the library and modify those items.

Inventory - New Folder for Girl Next Door
I would suggest 'girl next door' so open your inventory window and look in Library->Clothing->Girl Next Door by Renegade Clothing & Adam n Eve.  Now click on the first line, then scroll down and click on the last while holding down the shift key and copy all those selected by pressing ctrl-c.   Next go back up into Inventory->Clothing and right click on Clothing, choosing New Folder. Select it and paste the items you have copied into your new folder.

Then open that New Folder and make a copy of the shape named 'Girl Next Door' and the skin named 'Girl Next Door Medium Skin", naming the first 'Girl Next Door - edited' and 'eloh eliot's starlight' respectively.

OK, the housekeeping is done.  What we have now is a placeholder for our new skin, 'eloh eliot's starlight' and a placeholder for any shape modifications we want to make after making the new skin 'Girl Next Door - edited'.  Excellent!

The next step is to make our skin.... but .... well.... you know, there will be nudity involved.  So you will need to find a safe place where you can go and people will not be upset seeing a naked avatar.  If you know of such a place, great!  Skip the rest of this paragraph and go there.  If not, I can't give you such a place... but I may be able to guide you a bit in finding one.  First - don't go to a PG place.  I shouldn't need to get into why - just don't.  An Adult place is probably best - but Mature may be OK too.  An Adult sandbox might be good - or some place that is not used very much.  As you look for a place - read the rules and respect them.  If they say no nudity, move on to another.  Sooner or later you will find a place where nudity is acceptable.

Next we need to upload the textures you created using GIMP in the last step.  At the top of the screen, choose File->Upload->Image, then navigate to the folder on your computer where you stored the textures we created in the last step.... select one and press "Open".  Then on the window that you get in the Phoenix viewer, check "Temporary (Free)" and click "Upload".  Do this once for each of the three files, and get them all uploading into your inventory.   You can watch them appear by opening your Inventory->Textures.  You will see each appear in turn, and you will note that the name is in italics - and that it is a temporary file.

Girl Next Door - standard shape - standard medium skin.
Ok ... now you should be in a place where nudity is allowed, so remove all your clothes and wear the "Girl Next Door - edited" and "eloh eliot's starlight".  These are the place holders and now we'll make them the real thing.  The image to the right of this paragraph is what you should see.

She is a nice looking girl.  Sadly though she has a rather nasty problem.  No nipples.  *grimaces* I don't really understand the whole no nipple thing, but we won't dwell on it.  The next step is to create our new skin.

Here's how to make your new skin.


Edit Appearances - Skin
Right click on your avatar and choose "Edit Appearances".   You will find yourself with a window that gives you lots of ways to change things about your avatar, including the skin you are wearing.  If you look in the upper left you will see "Skin" listed.  Once you click 'skin' you will see a panel with three windows open up: note the three red arrows pointing at the small windows in the picture to the right of this paragraph.

The topmost window is the one that will receive the "Face" texture.  The middle window is the one that will receive the "Upper" texture.  And the bottom window is the one that will receive the "Lower" texture.

Now open your inventory window and find the Inventory->Textures folder.  Click on the "starlight_face" texture and drag it to the topmost window within the Edit Appearances window.  Then click on the "starlight_upper" texture and drag it to the middle window within the Edit Appearances window.  Finally click on the "starlight_lower" texture and drag it to the lower window within the Edit Appearances window..... and click Save, then click Close.

Girl Next Door - Standard Shape - Eloh Eliot's Starlight Skin
It make take a couple minutes for your new skin to appear and become clear - but once it does it should look like the image at the right.

Yay!  Nipples!  She looks pretty good doesn't she?  *does a happy dance!*

Now... let us pause for a few moments and bask in your achievement.  You have made a skin!  Of course, since we used temporary textures uploaded for free, it won't last.  In a few days you'll find that one or all of the textures on this skin have been 'grey'd out' - meaning you've lost the temporary texture.  To make it permanent you'll repeat the steps we took above and NOT check Temporary (Free) when you upload.   (And you need to have some money in your account.)  Then when you drag this permanent texture to the skin, it will not be lost after a few days.

Now look your skin over.  Use your camera controls and move your view around.  Zoom in and zoom out.  It looks pretty good, right?  

If you're like me though, you're seeing some things that you would like to change.  This usually registers as a 'hmmm that's not quite right' feeling.  Of course, it is purely subjective.  What is 'not quite right' to me may be just fine to you - and that is a GOOD THING.  It would be a horribly boring world if we all looked alike and all thought alike.   That said, I'll give you my list of things that are 'not quite right':

  • Hands... perhaps a bit large
  • Shoulders .... perhaps a bit broad
  • Face ... perhaps a bit long
  • Lips .... upper lip is not quite right
  • Legs ... perhaps a bit long
Most of the things above have to do with the shape, but the Lips certainly have something to do with the Skin.   We'll edit the shape later, but first let's continue our work on the skin.  As it happens, Eloh has given us several options in the files she has provided.  And one of those options is for a different 'style' of lips.  We'll play with that in the next post and see what happens.

See ya later!
robin